

Want to nail that holiday light photography? Start by showing up at twilight—it’s like magic time for photos! Christmas Lights Oakville wants to help you dial your ISO to 100, pop your aperture between f/8 and f/16, and embrace long exposures with a trusty tripod (no shaky hands allowed!). Get creative with angles and maybe throw in some snowmen for good measure. And hey, there’s plenty more tips where that came from to make your photos twinkle like the lights!
Big Takeaway
- Capture holiday lights during twilight for vibrant colors and enhanced dynamic range, about 15 minutes after sunset.
- Use a sturdy tripod, set your ISO to 100, and choose an aperture between f/8 and f/16 for clarity.
- Incorporate creative compositions by experimenting with angles, leading lines, and foreground elements for depth.
- Utilize long exposure times (1 to 30 seconds) to capture stunning light trails and avoid camera motion blur.
- Adjust white balance to incandescent for warm tones and prevent overexposure of LED lights in your shots.
Optimize Timing for Twilight Shots
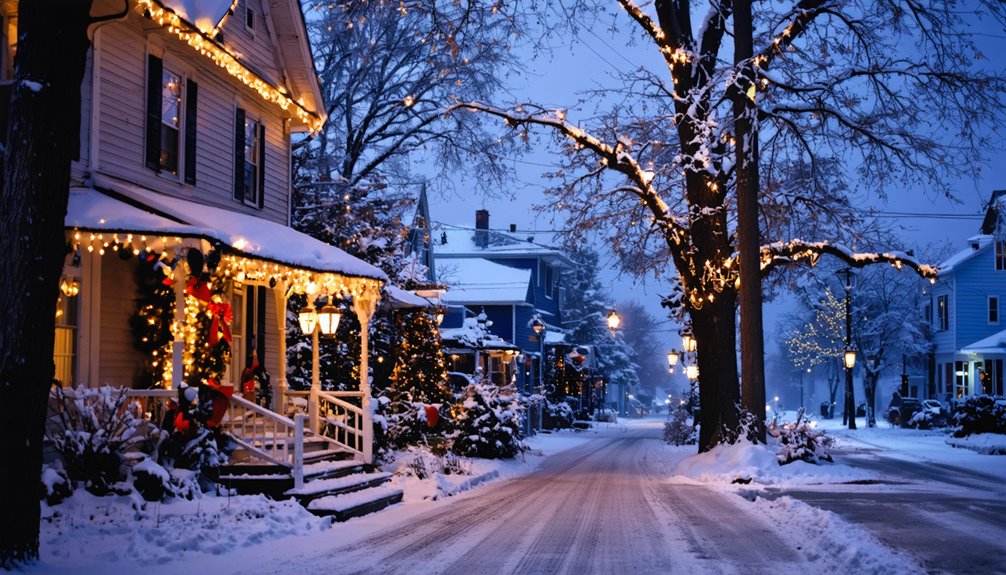
When’s the best time to snap those dazzling holiday lights? Well, it’s during the magical twilight, about 15 minutes after sunset, when the ambient light plays nice with those twinkling decorations.
You’ll want to capture images every five minutes to dance with the shift from natural light to the festive glow. Twilight’s like your best friend—it highlights tree branches and rooftops, making your photographs pop!
Arriving early gives you time to set up that trusty tripod and test settings before the blue hour kicks in. Trust me, that dynamic range will make your holiday lights shine brighter than your Aunt Edna’s fruitcake.
Master Your Camera Settings
Now that you’ve got the timing down for those magical twilight shots, it’s time to wrangle your camera settings like a pro!
First up, set your ISO to 100—let’s keep that noise in check, shall we?
Set your ISO to 100 for crisp, clear shots—let’s keep that pesky noise at bay!
Next, choose an aperture between f/8 and f/16; you want those twinkling lights to shine without losing the charming details around them.
Don’t be shy with long exposure—1 to 30 seconds works wonders, especially when you’re using a tripod (your new best friend).
Adjust your exposure to avoid those blindingly bright LED mishaps, and don’t forget to set your white balance to incandescent for capturing those warm holiday vibes.
Voilà! You’re now a camera wizard ready to light up the night!
Achieve Stability in Your Shots
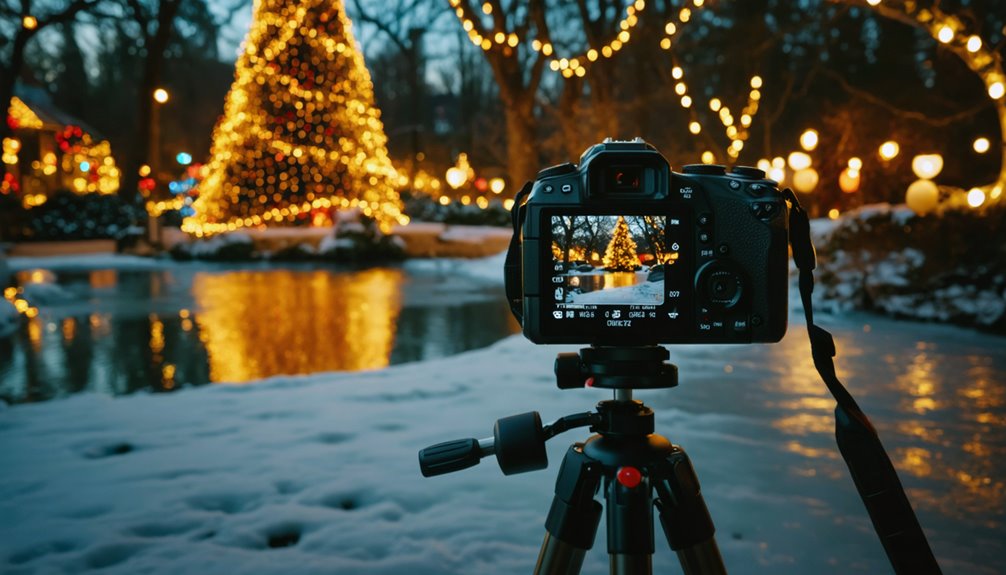
While you might dream of capturing the perfect holiday light display, shaky hands can turn your masterpiece into a blurry mess faster than you can say “fuzzy socks.”
To keep your shots as crisp as your favorite holiday cookie, a sturdy tripod is your best buddy. Here are three tips to achieve stability in your shots:
- Use a Tripod: It’s essential for those long exposure shots in low light conditions—no more camera shake ruining your festive vibe!
- Remote Shutter Release: Pressing that shutter button can cause vibrations, so opt for a remote or your camera’s timer to minimize those pesky shakes.
- Turn Off Stabilization Sensors: When using a tripod, disable image stabilization to avoid interference that can lead to slight movements.
Happy shooting!
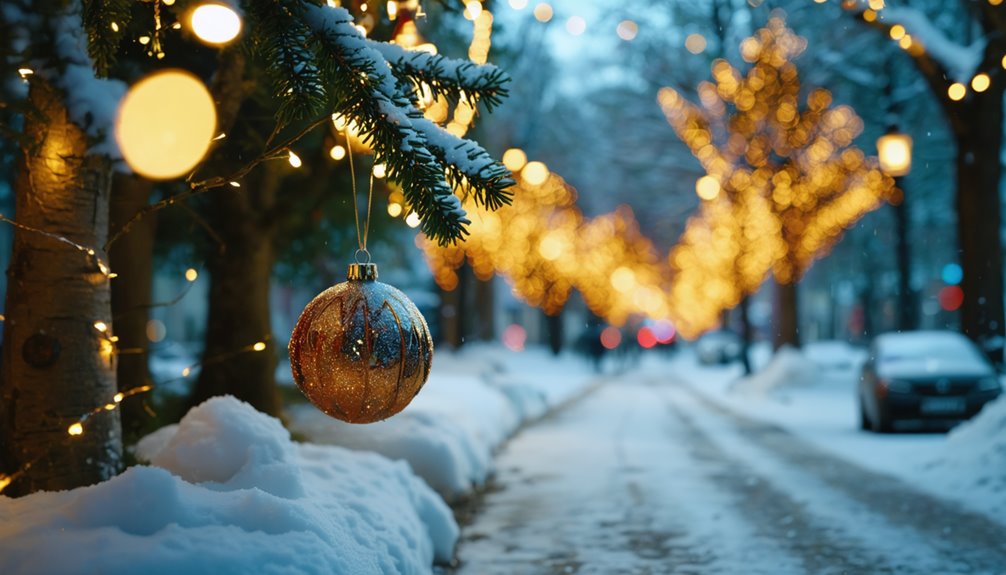
Explore Creative Compositions
As you immerse yourself in the enchanting world of holiday light photography, don’t just point and shoot—get a little creative!
Instead of standing there like a deer in headlights, try different angles. Shoot from a lower vantage point or include some foreground elements like a cheeky snowman to add depth.
Use leading lines, like that charming pathway, to guide your viewers’ eyes to the dazzling lights. Remember the rule of thirds—position those twinkling beauties along the grid lines for maximum impact.
And hey, if you can, capture those gorgeous reflections in water or glass surfaces. They’ll add dimension and make your photos pop!
Experiment With Unique Techniques
Ready to take your holiday light photography to the next level?
It’s time to release your inner mad scientist with some unique techniques!
Here’s how you can create stunning images that’ll make your friends wonder if you’ve got magical powers:
- Long exposure: Try 4 seconds at ISO 100 and f/8 to capture the dazzling trails of moving lights.
- Bokeh effects: Use a wide aperture (like f/2) for dreamy, circular highlights that’ll make you swoon.
- Camera movement: Shake things up! Experiment with different speeds while focusing on your subject to create dazzling abstract patterns.
Capture Indoor Holiday Magic
If you think capturing the magic of indoor holiday lights is as easy as snapping a selfie with your cat, think again! The holiday season demands a bit of finesse.
Grab your trusty tripod for this one—your camera’s gonna need stability while you play with a low ISO and a relatively slow shutter speed. Experiment with a wide aperture (hello, f/2!) to create that dreamy bokeh effect that makes Christmas lights twinkle like they’re auditioning for a rom-com!
Stabilize your shot with a tripod, play with low ISO, and let those Christmas lights twinkle with dreamy bokeh!
Don’t forget to brighten the scene with extra lamps to banish those pesky shadows. And use aperture priority mode to let your camera do the heavy lifting, ensuring your holiday masterpieces are bursting with vibrant colors and clarity.
Happy shooting!
Enhance Your Photos in Post-Processing
While your holiday light photos might sparkle on their own, a little post-processing magic can make them shine even brighter!
Think of it as giving your images a festive glow-up. Here are three tips to elevate your photos:
- Adjust brightness and contrast – let those lights dazzle like they were meant to!
- Enhance colors and saturation – make those festive hues pop, but don’t make them look like a candy cane exploded!
- Apply noise reduction – clean up any graininess for sharp, clear shots.
Don’t forget about cropping to focus on key elements and adding fun filters for that artistic touch.
With these tricks, you’ll have vibrant images that’ll make Santa himself do a double-take!
Frequently Asked Questions
How Do You Make Christmas Lights Look Good in Pictures?
To make Christmas lights pop, try crazy color techniques, playful composition tips, and quirky lighting angles. Tweak your exposure settings, choose fun backgrounds, toss in filter effects, and embrace post-processing tricks. Voilà, festive magic!
What Settings Should I Use for Christmas Light Photography?
For Christmas light photography, tweak your camera settings: ISO under 1600, aperture at f/8, and longer shutter speed. Don’t forget a tripod; shaky hands aren’t festive! Embrace the exposure triangle and let your creativity shine!
How to Make Christmas Lights Not Blurry in Photos?
To dodge dreary blurry lights, grab a trusty tripod for stability, tweak your ISO, and play with aperture settings. Focus techniques can turn those light trails into dazzling bokeh effects—making your photos sparkle with holiday cheer!
How Do You Make Christmas Lights Look Professional?
To make Christmas lights look professional, use clever camera angles, sprinkle in composition tips, and embrace editing techniques. Capture enchanting light bokeh and perfect color balance; your night photography will shine brighter than your neighbor’s display!
Our Summary
So there you have it—seven tips to elevate your holiday light photography from “meh” to “wow!” Just imagine accidentally stumbling into that perfect shot while trying to dodge a rogue snowball or a festive cat. With a little practice and creativity, you’ll be capturing dazzling displays faster than you can say “Jingle Bells!” Now grab your camera, channel your inner holiday elf, and get out there. Who knows? Your next masterpiece could be just a twinkle away!